Proper installation of your Hunter ceiling fan ensures optimal performance, safety, and longevity․ This manual provides detailed, step-by-step instructions to guide you through the process successfully․
1․1 Importance of Proper Installation
Proper installation of your Hunter ceiling fan is crucial for ensuring safety, optimal performance, and longevity․ Incorrect installation can lead to wobbling, noise, or even structural damage․ It also guarantees compliance with safety standards, preventing potential hazards like electrical shocks or blade detachment․ A well-installed fan operates efficiently, enhancing airflow and energy savings․ Additionally, proper installation preserves the fan’s warranty and ensures all features, such as lighting kits, function correctly․ Always follow the manual’s guidelines to avoid common pitfalls and ensure your fan runs smoothly for years․ Improper installation risks safety hazards and reduces the fan’s lifespan, making adherence to instructions essential․
1․2 Overview of the Hunter Fan Installation Manual
The Hunter Fan Installation Manual is a comprehensive guide designed to walk you through every step of the installation process․ It includes detailed instructions, safety precautions, and troubleshooting tips to ensure a successful setup․ The manual covers various installation methods, such as low-profile, standard, and angled ceiling setups, and provides clear diagrams for clarity․ It emphasizes proper electrical connections, fan blade attachment, and retention cable installation to guarantee safety and performance․ By following the manual, you can avoid common mistakes and ensure your fan operates efficiently for years to come․ Always refer to this manual for specific instructions tailored to your fan model․

Pre-Installation Preparation
Pre-installation preparation involves checking ceiling height, ensuring structural support, and gathering all necessary tools and materials․ Proper planning ensures a smooth and safe installation process․
2․1 Reading the Manual Thoroughly
Reading the manual thoroughly is crucial before starting the installation․ It ensures you understand all safety precautions, installation steps, and specific requirements for your Hunter ceiling fan․ The manual provides detailed instructions to avoid errors and potential hazards․ Pay attention to warnings, such as securing the retention cable to prevent accidents․ Familiarize yourself with tools and materials needed to save time․ Skipping this step may lead to improper installation, safety risks, or damage to the fan․ Always keep the manual handy for reference during the process and ensure it remains with the fan for future owners․
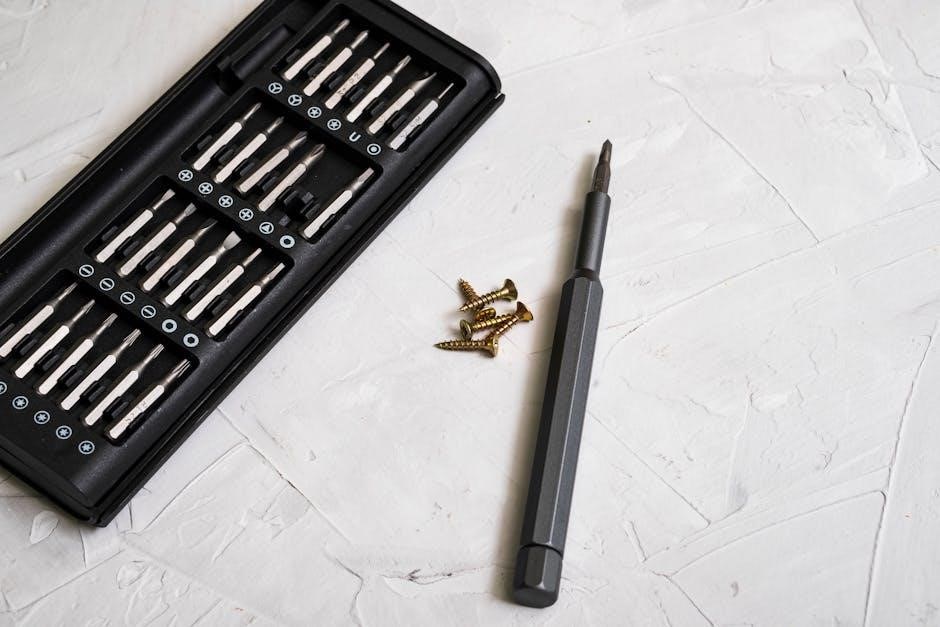
2․2 Gathering Necessary Tools and Materials
Gathering the correct tools and materials is essential for a smooth installation․ Typically, you will need a screwdriver, pliers, a drill, and potentially a ladder․ Ensure you have all screws, brackets, and hardware provided with the fan․ Additional materials like wire nuts or a retention cable may be required․ Refer to the manual for specific tools listed for your fan model․ Organize these items beforehand to avoid delays․ Safety gear, such as gloves and goggles, is also recommended․ Double-check the manual for any additional materials or tools needed for your particular installation method, such as low profile or angled ceilings․
2․3 Understanding Safety Precautions
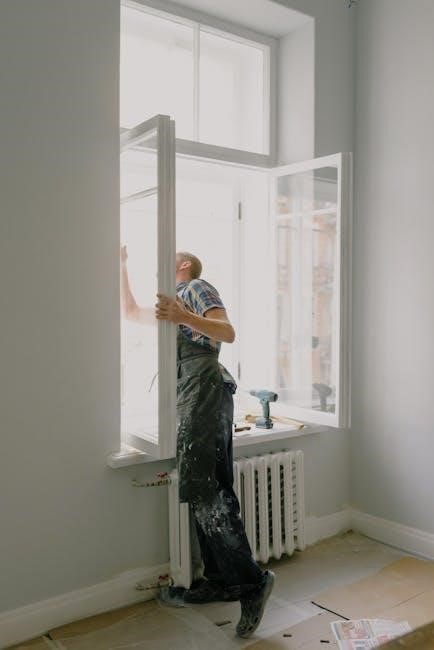
Before starting, ensure all safety precautions are understood․ Always turn off power to the circuit at the breaker box and verify it’s off using a voltage tester․ Wear safety goggles and gloves to protect against debris․ Use a sturdy ladder on a firm surface, and avoid overreaching․ Never stand on the top rung of a ladder․ Ensure the fan is securely fastened to the ceiling to prevent accidents․ Keep children and pets away from the work area․ Follow all local electrical codes and manufacturer guidelines․ Proper installation is crucial for safety and performance, so take your time and double-check each step․
Ceiling Fan Installation Methods
Hunter ceiling fans offer three installation methods: Low Profile, Standard, and Angled, each tailored to different ceiling heights and personal preferences for optimal performance․
3․1 Low Profile Installation
The Low Profile installation method is ideal for ceilings with limited space, typically less than 8 feet high․ This setup uses a shorter downrod to keep the fan close to the ceiling, ensuring a sleek appearance while maintaining airflow efficiency․ Begin by attaching the fan motor housing directly to the ceiling mount, ensuring it is securely fastened․ Next, install the retention cable to prevent any movement or wobbling․ Finally, attach the fan blades and ensure proper balance for smooth operation․ Always follow the manufacturer’s guidelines to avoid electrical hazards and ensure optimal performance․ Consult the manual for specific measurements and safety precautions․
3․2 Standard Installation
Standard Installation is the most common method for Hunter ceiling fans, suitable for ceilings with typical height (8-9 feet)․ It provides optimal airflow and aesthetic appeal․ Begin by attaching the fan motor housing to the ceiling mount, ensuring a secure connection․ Next, install the downrod (usually 3-4 inches for standard ceilings) and connect the wiring as per the manual․ Attach the fan blades and light kit (if applicable)․ Ensure all screws are tightened firmly․ Finally, test the fan to confirm smooth operation․ Always follow safety guidelines, such as turning off power and using the retention cable to prevent wobbling․ This method balances style and functionality perfectly․
3․3 Angled Ceiling Installation
For ceilings with angles or slopes, Hunter fans offer specialized installation options․ Use a longer downrod to ensure proper clearance and stability․ Secure the fan motor housing to a sturdy ceiling bracket designed for angled surfaces․ Tighten all screws firmly to prevent wobbling․ Attach the retention cable to the building structure for added safety․ Adjust the fan blades to maintain balance and even airflow․ Test the fan at a low speed to ensure smooth operation․ Always follow the manual’s specific guidelines for angled ceilings and consult a professional if unsure․ Proper installation ensures safety, efficiency, and optimal performance in non-traditional ceiling setups․

Electrical Requirements and Connections
Ensure the power is off at the circuit breaker before starting․ Wire the fan motor according to the manual’s instructions, securing all connections tightly․ Always test the circuit to confirm it’s de-energized, and follow local electrical codes for safe installation․
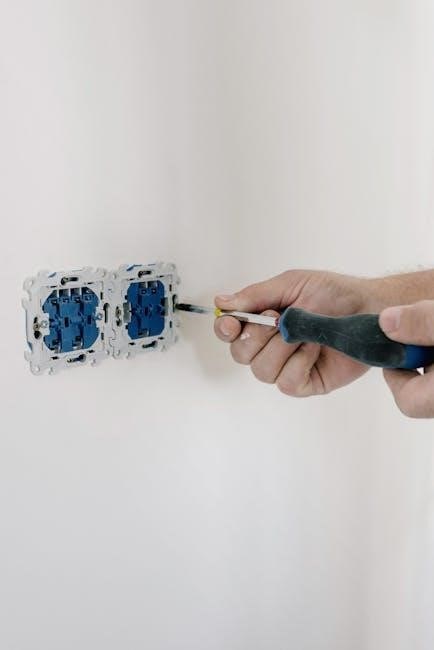
4․1 Turning Off Power and Testing
Before starting any electrical work, switch off the power to the circuit at the main circuit breaker․ Verify the power is off using a non-contact voltage tester on the black and white wires․ This ensures your safety and prevents electrical shock or damage․ Always double-check the circuit to confirm it’s de-energized․ Neglecting this step could result in serious injury or equipment damage․ Once confirmed, proceed with the installation, following the manual’s wiring instructions closely․ Remember, safety is paramount when handling electrical connections․
4․2 Wiring the Fan Motor
Connect the fan motor wires to the household wiring, ensuring correct color matching: black (fan) to black (power), white (neutral) to white, and copper (ground) to ground․ Secure all connections tightly with wire nuts or connectors․ Double-check the wiring diagram in the manual for accuracy․ If your fan has a light kit, connect the blue wire to the dimmer switch or appropriate control․ Ensure all connections are insulated and not exposed․ Avoid overtightening, which could damage the wires․ Proper wiring ensures safe and efficient operation of your Hunter ceiling fan, preventing potential electrical hazards or malfunctions․ Always follow local electrical codes and safety guidelines․
4․3 Installing a Ceiling Fan Switch
To install a ceiling fan switch, first ensure the power is turned off at the circuit breaker․ Connect the switch to the appropriate wires, typically the black (hot) wire from the fan and the corresponding wire from the power source․ If using a dimmer switch, ensure it is compatible with your fan’s motor and lighting․ Secure the switch to the wall and test its operation․ Proper installation ensures smooth control of fan speed and light functionality․ Always refer to the manual for specific wiring diagrams and compatibility guidelines to avoid electrical issues or damage to the fan’s components․
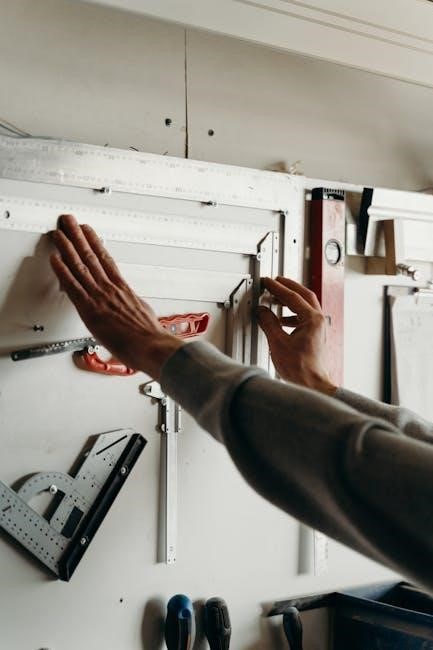
Mounting the Fan
Mounting the fan securely ensures stability and safety․ Use the provided hardware to attach the motor housing to the ceiling bracket, and always employ the retention cable for added support․
5․1 Locating Ceiling Joists
Locating ceiling joists is crucial for a secure fan installation․ Use a stud finder or gently tap the ceiling to identify the joists’ positions․ Ensure the fan bracket is mounted directly to a sturdy joist or support beam to prevent instability․ If joists are spaced widely, consider using a joist adapter or reinforced hanger․ Properly securing the fan to the ceiling structure ensures safety and prevents wobbling․ Always follow the manufacturer’s guidelines and double-check the weight capacity of the selected mounting point․ This step is essential for a stable and long-lasting installation․
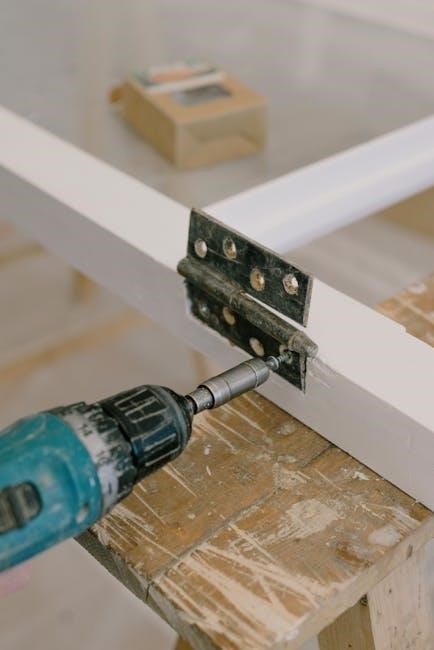
5․2 Securing the Fan Motor Housing
Securing the fan motor housing ensures stability and prevents damage․ Attach the motor housing to the mounting bracket using the provided screws․ Tighten them firmly but avoid over-tightening to prevent damage․ Ensure the housing is level and aligned properly․ Use the retention cable to secure the motor to the ceiling structure for added safety․ Double-check all connections and hardware to confirm they are tightly fastened․ Proper securing of the motor housing is vital for smooth operation and to minimize noise or movement during use․ Follow the manual’s specific torque recommendations for optimal results․
5․3 Attaching the Retention Cable
Attaching the retention cable is a critical step for safety and stability․ Locate the loop or hook on the ceiling structure and thread the retention cable through it․ Secure the other end of the cable to the designated point on the fan motor housing, ensuring it is tightly fastened․ This prevents the fan from swaying or falling, even during high-speed operation․ Always follow the manufacturer’s instructions for proper placement and tension․ Double-check the cable’s security to ensure it can withstand the fan’s weight and movement․ A properly attached retention cable is essential for safe and reliable operation of your Hunter ceiling fan․
Installing Fan Blades and Lighting
Install fan blades by aligning and securing them to the motor housing․ Attach the lighting kit as per the manual, ensuring all connections are tight․ Check blade balance and light functionality to ensure everything works smoothly․
6․1 Attaching Fan Blades
To attach fan blades, start by removing any protective covering from the blades․ Align each blade with the mounting screws on the motor housing, ensuring proper alignment․ Secure the blades using the provided bolts, tightening them evenly to avoid imbalance․ Next, connect the blade brackets to the motor, following the manual’s specific instructions․ Double-check that all screws are tightened firmly to prevent loosening over time․ Finally, verify that the blades are evenly spaced and aligned for balanced operation․ Proper blade attachment is crucial for smooth fan performance and to minimize wobbling or noise during operation․
6․2 Installing Light Kits
Installing a light kit on your Hunter fan enhances both aesthetics and functionality․ Begin by turning off the power to the fan at the electrical panel․ Remove the light kit from its packaging and identify the components, including the glass shade, harp, and mounting hardware․ Attach the light kit mounting bracket to the fan’s motor housing, following the manual’s instructions․ Connect the wires carefully, ensuring proper color matching for the electrical connections․ Secure the glass shade or light fixture to the bracket using the provided screws․ Finally, test the light kit by turning the power back on and verifying proper operation․ Ensure all connections are tight for safety and reliability․
6․3 Ensuring Proper Blade Balance
Proper blade balance is essential for smooth operation and to prevent wobbling or noise․ Start by ensuring all fan blades are securely attached and aligned evenly․ If the fan wobbles, check for uneven blade weight or alignment․ Use a balancing kit (if provided) to adjust the blades․ Gently spin the fan and observe any movement․ If imbalance persists, slightly bend the affected blade or adjust its position․ Ensure all screws are tightly secured․ A balanced fan operates quietly and efficiently, enhancing performance and longevity․ Always refer to the manual for specific balancing instructions tailored to your Hunter fan model;
Final Assembly and Testing
After completing all installations, perform a final assembly and test the fan to ensure all features work correctly and safely․
7․1 Assembling Fan Components
Begin by attaching the fan blades to the motor housing, ensuring each blade is securely fastened with the provided screws․ Next, install the light kit if applicable, connecting the wiring carefully as outlined in the manual․ Attach the glass shade or grille to conceal the light bulbs and complete the aesthetic look․ Double-check all connections to ensure they are tight and properly aligned․ Finally, verify that all components, such as the retention cable, are correctly secured to the building structure to prevent any movement or instability during operation․ This step ensures the fan operates smoothly and safely․
7․2 Testing Fan Operation
After assembling all components, restore power to the fan and test its operation․ Start by turning the fan on at a low speed to ensure smooth rotation․ Gradually increase the speed to check for any wobbling or unusual noise․ Verify that the light kit functions correctly if installed․ Test the reverse function to ensure proper airflow direction․ Check all remote or wall control settings to confirm they operate the fan as intended․ If any issues arise, refer to the manual for troubleshooting guidance․ Proper testing ensures the fan operates efficiently and safely, providing reliable performance for years to come․
7․3 Checking for Proper Functionality
Once the fan is fully assembled and powered on, perform a thorough check to ensure all features function correctly․ Verify that the fan operates smoothly at all speed settings and in both clockwise and counterclockwise directions․ Check that the light kit (if installed) turns on and off properly and adjusts brightness as intended․ Ensure the fan blades are balanced and that there is no wobbling or excessive noise․ Test the remote control or wall switch to confirm it controls the fan and light kit effectively․ Finally, ensure proper airflow by standing beneath the fan to feel the air circulation․ If everything works seamlessly, the installation is complete․
Troubleshooting Common Issues
This section helps identify and resolve common problems like wobbling, noise, or light malfunctions․ Refer to the manual for detailed solutions to ensure proper fan functionality and safety․
8․1 Addressing Wobbling or Noise
Wobbling or noise in your Hunter ceiling fan can be resolved by ensuring proper blade balance and secure mounting․ Check that all screws are tightened and blades are evenly aligned․ If issues persist, refer to the manual for additional troubleshooting steps to restore smooth operation and eliminate disturbances․
8․2 Fixing Light Kit Malfunctions
If your Hunter ceiling fan’s light kit isn’t functioning properly, start by verifying all electrical connections are secure․ Ensure the light switch is correctly installed and functioning․ Check for blown fuses or tripped circuit breakers․ If issues persist, inspect the light kit for damage or loose connections․ Refer to the manual for specific troubleshooting steps, and consider replacing faulty components if necessary․ Proper installation and regular maintenance can prevent such malfunctions and ensure reliable operation․
8․3 Resolving Motor Issues
If your Hunter ceiling fan’s motor is malfunctioning, start by ensuring all electrical connections are secure and properly installed․ Check for any blockages around the motor that could restrict airflow․ Verify that the fan is mounted correctly and the retention cable is securely attached to prevent wobbling․ If the motor is noisy or vibrating excessively, inspect for loose screws or misaligned parts․ Consult the manual for specific troubleshooting steps․ If issues persist, contact Hunter Fan support or a licensed electrician for professional assistance․ Proper installation and regular maintenance can help prevent motor-related problems and ensure smooth operation․
Maintenance and Upkeep
Regular cleaning of fan blades prevents dust buildup․ Lubricate moving parts annually for smooth operation․ Schedule regular inspections to ensure functionality and safety․
9․1 Cleaning the Fan Blades
Regularly cleaning the fan blades ensures optimal airflow and prevents dust buildup․ Turn off the power and use a soft, dry cloth to wipe down the blades․ For stubborn dirt, dampen the cloth with mild detergent, but avoid harsh chemicals․ Inspect each blade for dust or debris accumulation, which can affect balance and performance․ Clean the light kit and glass covers if your fan has them․ Allow all parts to dry thoroughly before turning the fan back on․ This simple maintenance step improves air circulation, reduces noise, and prolongs the fan’s lifespan, ensuring it operates efficiently for years to come․
9․2 Lubricating Moving Parts
Regular lubrication of moving parts ensures smooth operation and reduces wear on the fan’s motor․ Use a high-quality, silicone-based lubricant specifically designed for ceiling fans․ Apply a small amount to the motor housing and any moving components, such as the bearing or pivot points․ Avoid using oil or grease, as they can attract dust and create maintenance issues․ Lubricate every 6-12 months or when you notice slight noise or vibration․ Always turn off the power before performing this task․ Proper lubrication enhances the fan’s performance, extends its lifespan, and maintains its energy efficiency, ensuring it runs quietly and reliably for years to come․
9․3 Regular Inspection Schedule
Regular inspections are crucial for maintaining your Hunter fan’s performance and safety․ Schedule inspections every 6-12 months, or more frequently in dusty environments․ Check for dust accumulation, blade balance, and secure fasteners․ Inspect the retention cable and motor housing for wear or damage․ Ensure all connections are tight and the fan is properly aligned․ Clean blades and housing during inspections to prevent dust buildup, which can affect airflow and motor efficiency․ Address any issues promptly to prevent vibration or noise․ If unsure, consult a professional․ Regular inspections ensure your fan operates safely, efficiently, and quietly, prolonging its lifespan and maintaining optimal performance․ Stay proactive to avoid potential problems․
Proper installation and regular maintenance ensure your Hunter fan operates safely and efficiently․ Always keep this manual for future reference to maintain optimal performance and functionality․
10․1 Final Checks and Safety Verification
After completing the installation, perform a thorough inspection to ensure all components are securely fastened․ Verify that the fan operates smoothly, with no wobbling or unusual noise․ Check electrical connections for tightness and ensure the retention cable is properly secured․ Test all fan speeds and light functions to confirm proper operation․ Safety is paramount, so double-check that the fan is mounted correctly and all safety precautions outlined in the manual have been followed․ This final verification ensures your Hunter fan is installed safely and will function reliably for years to come․
10․2 Storing the Manual for Future Reference
After completing the installation, store the manual in a safe, accessible location for future reference․ This ensures that maintenance, troubleshooting, and repair instructions remain available; Keep the manual with the fan if it is moved or sold, as it contains essential information for operation and care․ Regularly reviewing the manual can help prevent issues and ensure the fan continues to perform optimally․ Proper storage of the manual is a key step in maintaining your Hunter fan’s longevity and functionality, providing peace of mind for years to come․


About the author