Monthly Archive February 26, 2026

Byalessandro

cafe bustelo instant coffee instructions

Understanding Cafe Bustelo Instant Coffee

Cafe Bustelo is a popular espresso-style coffee known for its bold and rich flavor profile, offering a convenient way to enjoy a robust coffee experience․

This instant coffee simplifies preparation, delivering a captivating aroma and taste with just the addition of hot water or milk, stirring is key!

It’s a versatile option, easily adaptable for both hot and iced beverages, ensuring a consistently satisfying cup every time, regardless of brewing preference․

What is Cafe Bustelo?

Cafe Bustelo is more than just instant coffee; it’s a cultural icon, deeply rooted in the traditions of Cuban coffee preparation and enjoyed widely across Latin American communities․

Specifically, Cafe Bustelo is an espresso-style coffee designed to deliver a bold, full-bodied flavor experience․ It’s characterized by its dark roast and intense aroma, offering a robust taste that distinguishes it from milder coffee blends․

The instant version maintains this signature profile, providing a convenient alternative to traditional brewing methods without sacrificing the authentic Cafe Bustelo taste․ Preparation is remarkably simple – just add hot water or milk, stir well, and you’re ready to savor a captivating cup․

It’s a versatile product, suitable for creating classic espresso-style drinks or enjoying as a quick and easy everyday coffee․ The brand consistently emphasizes exceptional taste and ease of preparation, making it a favorite among coffee enthusiasts seeking a strong, flavorful brew․

The History of Cafe Bustelo

Cafe Bustelo’s story began in 1928 in New York City, born from the vision of José Emilio Valdés, who sought to bring the rich coffee traditions of Cuba to the United States․

He aimed to provide the Cuban exile community with a taste of home, crafting a blend that mirrored the strong, flavorful coffee enjoyed in Havana’s cafes․ The name “Bustelo” itself evokes the lively, bustling atmosphere of these Cuban coffee houses․

Initially sold door-to-door, the brand quickly gained popularity within the Latin community, becoming a staple in households and bodegas throughout New York․ Over the decades, Cafe Bustelo expanded its reach, becoming a beloved coffee choice across diverse cultures․

The introduction of instant Cafe Bustelo further broadened its accessibility, offering the same bold flavor in a convenient format․ Today, it remains a symbol of heritage, quality, and the vibrant spirit of Cuban coffee culture, enjoyed simply with hot water or milk․

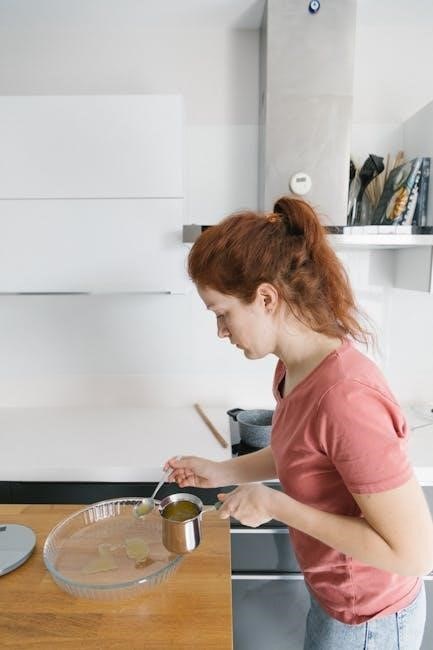
Preparing Cafe Bustelo Instant Coffee

Preparation is remarkably simple: just add hot water or milk to Cafe Bustelo, stir well, and savor the bold flavor and captivating aroma instantly!

Recommended Water Temperature

Achieving the optimal flavor from your Cafe Bustelo instant coffee hinges significantly on water temperature․ While the brand doesn’t specify an exact degree, generally, water just off the boil – around 195-205°F (90-96°C) – is ideal․

Using boiling water can scorch the coffee granules, potentially leading to a slightly bitter taste․ However, with instant coffee, the risk is lower than with ground coffee․

If you don’t have a thermometer, a good rule of thumb is to let the boiled water sit for about 30-60 seconds before pouring it over the Cafe Bustelo․ This allows it to cool slightly․

Experimenting within this range is encouraged to find your personal preference․ Cooler water might yield a smoother, less intense flavor, while slightly hotter water will maximize the boldness․ Remember, consistency in temperature will help you replicate your perfect cup every time!

Coffee to Water Ratio: Standard Measurements

For a classic Cafe Bustelo experience, a standard starting point is one teaspoon of instant coffee granules per six fluid ounces (approximately 177ml) of water or milk․ This ratio delivers a robust, flavorful cup that embodies the brand’s signature boldness․

However, this is merely a guideline․ Many coffee enthusiasts prefer a slightly stronger brew․ Don’t hesitate to adjust the amount of coffee to suit your individual taste preferences․

Using a measuring spoon ensures consistency․ A level teaspoon is recommended to avoid accidental over- or under-measurement․

If you’re preparing a larger batch, simply scale the measurements accordingly․ For example, two teaspoons of coffee for twelve ounces of liquid․ Remember to stir thoroughly to ensure complete dissolution of the granules, resulting in a smooth and enjoyable beverage․

Coffee to Water Ratio: Adjusting for Strength

To tailor your Cafe Bustelo experience, adjusting the coffee-to-water ratio is key․ For a milder flavor, reduce the amount of coffee to half a teaspoon per six ounces of water․ This creates a smoother, less intense brew, ideal for those sensitive to strong coffee․

Conversely, if you crave a bolder, more robust taste, increase the coffee to one and a half or even two teaspoons per six ounces․ Experimentation is encouraged to discover your perfect strength!

Remember that the quality of your water also impacts the final flavor․ Filtered water is recommended for optimal results․

Gradual adjustments are best․ Add or subtract a quarter teaspoon at a time until you achieve your desired level of intensity․ Keep notes on your preferred ratios for future consistency, ensuring every cup is perfectly brewed to your liking․

Brewing Methods

Cafe Bustelo’s versatility shines through various brewing methods; enjoy it hot with a simple water or milk addition, or chill it for a refreshing iced coffee experience!

Preparation is remarkably straightforward, adapting to your preferred temperature and style, offering convenience without compromising on bold flavor․

Hot Coffee Preparation

Creating a delightful hot cup of Cafe Bustelo is incredibly simple and quick, perfect for those moments when you crave a bold, flavorful coffee experience․ Begin by heating approximately 6 fluid ounces of water – the ideal temperature isn’t strictly defined, but hot water is essential for optimal dissolution and flavor extraction․

Next, add one teaspoon of Cafe Bustelo instant coffee to your favorite mug․ Pour the hot water over the coffee granules, ensuring they are fully submerged․ A gentle stir is all that’s needed to completely dissolve the coffee and release its rich aroma․

For those who prefer a creamier texture, feel free to add hot milk – the amount is entirely to your taste! Whether you enjoy it black, with a splash of milk, or sweetened to perfection, Cafe Bustelo provides a consistently satisfying hot coffee experience․ Experiment with different water-to-coffee ratios to find your ideal strength․

Iced Coffee Preparation

Enjoying a refreshing iced Cafe Bustelo is surprisingly easy, offering a cool and invigorating twist on the classic espresso-style flavor․ Start by preparing a concentrated coffee base – use one teaspoon of Cafe Bustelo instant coffee with a smaller amount of hot water, around 2-3 fluid ounces․ Stir well to ensure complete dissolution․

Next, fill a glass with ice cubes․ Pour the concentrated coffee over the ice, allowing it to chill rapidly․ Top off the glass with cold water, adjusting the amount to your desired strength and dilution․

For an extra creamy and indulgent treat, add milk or your favorite non-dairy alternative․ Cafe Bustelo’s bold flavor holds up beautifully when chilled, making it perfect for iced coffee․ Feel free to add sweeteners or flavorings to customize your iced coffee creation!

Cafe Bustelo with Milk

Creating a smooth and comforting Cafe Bustelo with milk is a simple pleasure․ Begin by preparing your Cafe Bustelo instant coffee – typically one teaspoon mixed with 6 fluid ounces of hot water․ Stir thoroughly until the coffee is fully dissolved, ensuring a consistent flavor․

Gently warm your preferred type of milk – dairy, almond, soy, or oat milk all work wonderfully․ The amount of milk is entirely customizable, depending on your desired creaminess․ Start with around 4-5 fluid ounces and adjust to taste․

Pour the warmed milk into your coffee, stirring gently to combine․ The milk mellows Cafe Bustelo’s bold flavor, creating a balanced and satisfying beverage․ Experiment with different milk-to-coffee ratios to find your perfect cup․ A dash of sweetener can further enhance the experience!

Variations & Additions

Elevate your Cafe Bustelo experience with delightful additions! Explore sweetness with sugar or sweeteners, spice it up, or indulge in a chocolatey twist․

These simple enhancements transform your coffee into a personalized and flavorful treat, catering to your unique preferences and desires․

Adding Sugar & Sweeteners

Sweetening your Cafe Bustelo is a simple way to personalize your coffee experience, enhancing its bold flavor to your exact liking․ Granulated sugar is a classic choice, dissolving readily in the hot coffee, providing a clean sweetness․

However, don’t limit yourself! Consider alternative sweeteners like honey, maple syrup, or agave nectar for a more nuanced flavor profile․ These natural options add a subtle complexity alongside sweetness․

Artificial sweeteners, such as stevia or sucralose, are also viable options for those watching their sugar intake, offering sweetness without the calories․ Experiment with different amounts to find your perfect balance․

Start with a small amount – about a teaspoon – and adjust to taste․ Remember, Cafe Bustelo already possesses a robust flavor, so a little sweetener can go a long way․ Stir thoroughly to ensure complete dissolution and enjoy!

Ultimately, the best sweetener is the one that complements your palate and elevates your Cafe Bustelo enjoyment;

Spiced Cafe Bustelo

Elevate your Cafe Bustelo with a delightful infusion of spices, transforming a classic coffee into a warm and aromatic treat․ Cinnamon is a popular choice, adding a comforting sweetness and subtle spice that complements the coffee’s boldness;

Nutmeg offers a warm, nutty flavor, while a dash of cardamom introduces an exotic and fragrant note․ For a touch of heat, consider a pinch of cayenne pepper – use sparingly! These spices blend beautifully with Cafe Bustelo’s rich profile․

You can add spices directly to your coffee grounds before brewing, or stir them into the prepared coffee․ Start with ¼ teaspoon of your chosen spice and adjust to taste․ A combination of cinnamon and nutmeg is particularly harmonious․

Experiment with different spice blends to discover your signature flavor․ A sprinkle of cocoa powder can also enhance the spiced experience, creating a mocha-inspired delight․ Enjoy the cozy warmth of spiced Cafe Bustelo!

Cafe Bustelo with Chocolate

Transform your Cafe Bustelo into a decadent mocha experience with the addition of chocolate! This pairing beautifully complements the coffee’s bold flavor, creating a rich and satisfying beverage․ Several options exist for incorporating chocolate into your brew․

Cocoa powder is a simple and effective choice; stir one to two teaspoons into your hot coffee for a classic mocha taste․ For a more intense chocolate flavor, use chocolate syrup – start with a tablespoon and adjust to your preference․

Melted dark chocolate offers a luxurious and sophisticated twist․ Add a square or two of melted chocolate to your coffee and stir until fully dissolved․ White chocolate provides a sweeter, creamier alternative․

Don’t hesitate to experiment with different types of chocolate to find your perfect combination․ A sprinkle of chocolate shavings on top adds a delightful finishing touch․ Enjoy this indulgent treat!

Troubleshooting Common Issues

If your Cafe Bustelo tastes weak, use less water or add more coffee․ Conversely, for a stronger brew, reduce water or increase the coffee amount!

Coffee Too Weak

Experiencing a lackluster Cafe Bustelo brew? Don’t despair! A weak coffee often indicates an imbalance in the coffee-to-water ratio․ The most common culprit is using too much water for the amount of instant coffee granules․ To rectify this, begin by incrementally decreasing the amount of water you’re using․

Alternatively, and equally effective, is to increase the quantity of Cafe Bustelo instant coffee added to your cup․ Start with a small addition – perhaps another half teaspoon – and thoroughly stir to ensure complete dissolution․ Remember, Cafe Bustelo is designed to be a bold, robust coffee, so don’t be afraid to experiment until you achieve your desired strength․

Consider also ensuring your water is sufficiently hot; lukewarm water can hinder proper extraction of the coffee’s flavor․ Finally, confirm you are using the recommended 6 fluid ounces of water per teaspoon of coffee as a baseline for adjustments․

Coffee Too Strong

Finding your Cafe Bustelo a bit too intense? A strong brew typically means you’ve used too much coffee relative to the water․ The simplest solution is to add more hot water to dilute the concentration․ Start by adding a small amount – perhaps an ounce or two – and stir well to integrate it fully into the coffee․

Conversely, you can reduce the amount of Cafe Bustelo instant coffee used in your next preparation; Decrease the quantity by a quarter or half a teaspoon and observe the difference․ Remember, personal preference plays a significant role, so adjust gradually until you reach your ideal balance․

If you’ve already added milk, consider adding a bit more to mellow out the boldness․ Cafe Bustelo’s robust flavor pairs well with milk, offering a smoother, more palatable experience․ Always remember the standard ratio is one teaspoon to 6 fluid ounces․

Storage and Shelf Life

To maintain the exceptional quality and bold flavor of your Cafe Bustelo instant coffee, proper storage is crucial․ It’s best to store the container in a cool, dry, and dark place, away from direct sunlight, heat sources, and moisture․ An airtight container is essential to prevent the absorption of unwanted odors and preserve the coffee’s aroma․

While Cafe Bustelo doesn’t technically “expire,” its flavor and quality will gradually diminish over time․ Generally, an unopened jar of Cafe Bustelo instant coffee can maintain its optimal flavor for up to two years from the date of manufacture․ Once opened, it’s recommended to consume it within six to twelve months for the best experience․

Always ensure the lid is tightly sealed after each use to protect the coffee from air exposure․ Proper storage ensures each cup delivers the rich, authentic Cafe Bustelo taste you expect․

Byalessandro

singer 44s heavy duty manual

Singer 44S Heavy Duty Manual: Article Plan

This comprehensive guide details the Singer 44S, covering setup, operation, troubleshooting, and maintenance. It’s designed for both beginners and experienced sewists seeking detailed instructions.

The Singer 44S Heavy Duty sewing machine represents a cornerstone in Singer’s long history of providing reliable sewing solutions. For over 160 years, the SINGER brand has been synonymous with quality, and the 44S continues this tradition, specifically catering to those who demand power and durability. This machine isn’t just for simple alterations; it’s built to handle demanding projects involving thicker fabrics like denim, canvas, and even leather.

This introduction will serve as your starting point for mastering this versatile machine. Whether you’re a seasoned seamster or just beginning your sewing journey, understanding the capabilities of the 44S is crucial. We’ll explore its core features, delve into its specifications, and provide a roadmap for utilizing its full potential. Access to the official manual, readily available online as a PDF, is highly recommended throughout this learning process. Prepare to unlock a world of sewing possibilities with the Singer 44S!

What is the Singer 44S Heavy Duty Sewing Machine?

The Singer 44S Heavy Duty is a robust sewing machine engineered for tackling challenging projects. Unlike standard machines, it boasts a powerful motor and a sturdy metal interior frame, providing exceptional durability and consistent performance. This machine excels at sewing through multiple layers of fabric and heavier materials like denim, upholstery, and leather – tasks that can strain less powerful machines.

It’s designed for both home use and more demanding applications, making it a favorite among quilters, crafters, and those who frequently repair or alter heavy-duty items. The 44S isn’t just about power; it also offers a range of useful stitches and adjustable settings. Finding the freely available online PDF manual is essential for understanding all its features and maximizing its capabilities. It’s a reliable workhorse built to last.

Key Features and Benefits

The Singer 44S Heavy Duty offers several standout features. Its powerful motor effortlessly handles thick fabrics, while the metal frame ensures stability and longevity. A key benefit is its ability to consistently deliver high-quality stitches, even through demanding materials like denim or canvas.

Users appreciate the machine’s straightforward operation and the readily available, free PDF manual for guidance. It includes a selection of essential stitches for various projects, and adjustable stitch length and width provide customization. The machine’s durability reduces the need for frequent repairs, saving time and money. Ultimately, the 44S empowers sewists to confidently tackle projects previously beyond their reach, offering a blend of power, reliability, and ease of use.

Understanding the Machine Specifications

The Singer 44S Heavy Duty boasts a robust construction designed for demanding tasks. Key specifications include a solid metal interior frame, contributing to its durability and reduced vibration during operation. The machine features a powerful motor, capable of handling thicker fabrics with ease.

It offers a selection of built-in stitches, typically including straight, zigzag, and buttonhole options, catering to a range of sewing needs. The maximum stitch width and length are adjustable, providing versatility. The free arm functionality simplifies cuff and sleeve sewing. Understanding these specifications – the motor power, frame material, and stitch capabilities – is crucial for maximizing the machine’s potential and ensuring it aligns with your specific sewing projects. Detailed specifications are readily available in the downloadable user manual.

Getting Started with Your Singer 44S

Initial steps involve unboxing, setting up the machine, learning to thread it correctly, and mastering the bobbin winding process.

Unboxing and Initial Setup

Carefully unpack your Singer 44S Heavy Duty sewing machine, ensuring all components are present. These typically include the machine itself, a power cord, various presser feet (standard, zipper, buttonhole, etc.), bobbins, needles, a screwdriver, a seam ripper, and the user manual. Inspect the machine for any shipping damage before proceeding.

Place the sewing machine on a stable, flat surface with adequate space for operation and fabric handling. Connect the power cord securely. Before the first use, ensure the bobbin case is properly inserted and empty. Familiarize yourself with the machine’s key parts – the handwheel, stitch selector dial, tension dials, and presser foot lever. A quick review of the manual’s diagrams will be incredibly helpful. Finally, give the handwheel a gentle turn to confirm smooth operation and proper functionality before threading.

Threading the Machine

Proper threading is crucial for optimal Singer 44S performance. Begin by raising the presser foot; this opens the tension discs. Guide the thread from the spool pin, through the first thread guide, and then down and around the tension discs. Ensure the thread seats firmly between the discs for correct tension. Continue threading through the take-up lever, guiding it fully into the slot.

Next, thread the needle from front to back (consult your manual for specific needle threading instructions). Finally, draw a length of thread through the needle eye, approximately 4-6 inches. A threader can be helpful if needed. Double-check that the thread is correctly seated in all guides and the tension discs are engaged. Incorrect threading is a common cause of skipped stitches or thread breakage, so accuracy is key.

Winding the Bobbin

Winding the bobbin correctly ensures smooth and consistent stitching on your Singer 44S. Place the spool of thread on the spool pin and guide the thread to the bobbin winding tension disc. Then, thread the end of the thread through a hole in the bobbin and onto the bobbin itself, winding it a few turns by hand to secure it.

Next, push the bobbin winder stem to the right and engage it. Press the foot pedal gently to begin winding. The machine will automatically stop when the bobbin is full. Disengage the bobbin winder, remove the bobbin, and clip the thread. Insert the wound bobbin into the bobbin case, ensuring it clicks into place. Proper bobbin winding is essential for preventing uneven stitches and thread nests.

Using the Singer 44S: Core Functions

Mastering stitch selection, length/width adjustments, and reverse stitching unlocks the Singer 44S’s potential. These core functions provide control and versatility for projects.

Stitch Selection Guide

The Singer 44S Heavy Duty machine offers a selection of stitches designed for various sewing applications. Understanding these options is crucial for achieving professional results. Primarily, this machine excels with straight stitches, ideal for constructing garments, quilting, and general repairs. The stitch width can be adjusted to create narrower or wider straight stitches, influencing the seam strength and aesthetic.

Zigzag stitches are also available, providing elasticity and preventing fabric fraying, particularly useful for knit fabrics and decorative applications. Adjusting the zigzag width alters the stitch’s stretchiness and coverage. Beyond these basics, the 44S includes decorative stitches for adding embellishments to projects. Refer to the machine’s faceplate or the user manual for a visual guide to each stitch and its recommended uses. Experimenting with different stitches on scrap fabric is highly recommended before starting a project to ensure the desired outcome.

Adjusting Stitch Length and Width

Precise control over stitch length and width is fundamental to successful sewing with the Singer 44S Heavy Duty. The stitch length dial, typically located on the machine’s faceplate, allows you to modify the distance between individual stitches. Shorter stitch lengths are ideal for delicate fabrics and intricate details, providing greater security and preventing puckering. Conversely, longer stitch lengths are suitable for basting, gathering, or sewing thicker materials, offering increased speed and flexibility.

The stitch width dial controls the lateral extent of stitches like zigzag. A narrower width creates a denser, more secure stitch, while a wider width provides greater stretch and coverage. Always test stitch settings on scrap fabric before applying them to your project. Incorrect settings can lead to skipped stitches, fabric damage, or uneven seams. Refer to the user manual for specific recommendations based on fabric type and desired effect.

Reverse Stitching Explained

Reverse stitching, crucial for securing seams, is easily achieved on the Singer 44S Heavy Duty. Typically activated by a lever or button near the needle, it allows the machine to sew backward, reinforcing the beginning and end of a seam. This prevents unraveling and ensures durability, especially in high-stress areas of your projects.

When initiating a seam, sew forward for a few stitches, then engage the reverse lever and stitch backward over those same stitches. Repeat this process at the end of the seam. The length of the reverse stitching is adjustable on some models; shorter reverse stitches provide greater security, while longer ones are quicker. Avoid excessive reverse stitching, as it can create bulkiness and potentially damage the fabric. Always test on scrap material to determine the optimal reverse stitch length for your chosen fabric and project.

Advanced Techniques & Troubleshooting

Mastering thick fabrics and resolving common issues like thread breakage or skipped stitches unlocks the Singer 44S’s full potential. Proper needle selection is key.

Sewing Thick Fabrics (Denim, Leather)

The Singer 44S excels at handling demanding materials like denim and leather, but requires specific techniques for optimal results. Begin by selecting the correct needle – a size 16 or 18 (or even 20 for very heavy leather) is generally recommended. A leather needle, specifically designed with a cutting point, is crucial for piercing leather cleanly without tearing.

Reduce the presser foot pressure if possible, as excessive pressure can hinder fabric movement. Increase the stitch length slightly to allow for better penetration. A walking foot is an invaluable accessory when working with slippery or multiple layers of fabric, ensuring even feeding.

Sew slowly and steadily, allowing the machine to power through the thicker material. Avoid pulling or pushing the fabric; let the feed dogs do the work. Test on scrap fabric first to fine-tune your settings and ensure a clean, consistent stitch. Remember to use heavier-duty thread appropriate for the fabric weight.

Troubleshooting Common Issues (Thread Breakage, Skipped Stitches)

Thread breakage and skipped stitches are frequent issues, often easily resolved. For thread breakage, re-thread the machine, ensuring the thread is properly seated in all tension discs and guides. Use quality thread and check for nicks or damage. Incorrect needle size or type is a common culprit – match the needle to the fabric weight.

Skipped stitches often indicate a dull or incorrect needle. Replace the needle and verify it’s fully inserted. Ensure the bobbin is wound evenly and inserted correctly. Adjust the upper tension; too tight or too loose can cause issues.

Clean the bobbin area, removing lint and debris. A properly cleaned machine operates more smoothly. Finally, confirm the presser foot is down, as the machine won’t stitch correctly without it engaged. If problems persist, consult the full manual for detailed diagrams.

Needle and Presser Foot Selection

Choosing the correct needle and presser foot is crucial for optimal sewing performance with the Singer 44S. Universal needles work well for woven fabrics, while ballpoint needles are essential for knits to prevent runs and snags. Denim needles are specifically designed for heavier fabrics like denim and canvas.

The Singer 44S benefits from using the appropriate presser foot. A standard foot is ideal for general sewing. A heavy-duty foot is recommended for thicker materials, providing increased pressure. A zipper foot facilitates close-to-edge stitching along zippers.

Consider a walking foot when working with multiple layers or slippery fabrics, ensuring even fabric feed. Always refer to the manual for specific recommendations based on your project. Incorrect selections can lead to skipped stitches or fabric damage.

Maintenance and Care

Regular cleaning and lubrication are vital for the Singer 44S’s longevity. Proper care ensures smooth operation and prevents issues, maintaining its heavy-duty performance.

Cleaning Your Singer 44S

Maintaining a clean Singer 44S is crucial for optimal performance and longevity. Before any cleaning, always disconnect the machine from the power source. Begin by removing the needle, presser foot, and bobbin case. Use a soft brush – often included with the machine – to remove lint and debris from the bobbin area, feed dogs, and around the needle plate.

For more stubborn lint, a lint brush or a can of compressed air can be incredibly helpful. Gently brush or blow away the accumulated fibers. Avoid using liquids directly on the machine; instead, dampen a soft cloth with a small amount of sewing machine oil or a dedicated sewing machine cleaner and wipe down the exterior surfaces. Pay attention to areas where oil may accumulate.

Regularly cleaning prevents thread buildup, which can cause tension issues and skipped stitches. A clean machine operates more smoothly and efficiently, reducing the risk of breakdowns and extending the life of your Singer 44S. Remember to clean after every project or at least monthly with regular use.

Lubrication Guide

Proper lubrication is vital for the smooth operation of your Singer 44S Heavy Duty sewing machine. However, modern Singer 44S models are largely sealed and require minimal oiling. Over-oiling can actually attract dust and cause more problems than it solves. Consult your user manual for specific guidance, as excessive lubrication can void the warranty.

Typically, lubrication points include the bobbin race and the hook area. Apply only a few drops of high-quality sewing machine oil to these areas, using the oiler provided with your machine. Avoid getting oil on the feed dogs or any plastic components. After oiling, operate the machine slowly for a few minutes to distribute the oil evenly.

Wipe away any excess oil with a clean, lint-free cloth. Regular, careful lubrication – when needed – ensures the machine’s internal parts move freely, reducing friction and preventing wear. Always prioritize following the manufacturer’s recommendations in the user manual.

Replacing Parts (Needles, Bobbins)

Maintaining your Singer 44S involves periodically replacing wear-and-tear components like needles and bobbins. Needles should be changed frequently, especially when sewing thick fabrics or noticing skipped stitches. Always use needles specifically designed for your machine and fabric type – universal, ballpoint, or denim needles are common choices.

To replace the needle, ensure the machine is turned off and unplugged. Loosen the needle clamp screw, remove the old needle, and insert a new one with the flat side facing the back. Tighten the screw securely. Bobbins are easily replaced by inserting a new, wound bobbin into the bobbin case, ensuring it feeds correctly.

Genuine Singer bobbins are recommended for optimal performance. Refer to your manual for detailed diagrams and instructions. Regularly checking and replacing these parts ensures consistent stitch quality and prevents machine damage.

Resources and Support

Access the official Singer website for manuals, FAQs, and troubleshooting. Additional support is available through online sewing communities and authorized Singer service centers.

Downloading the User Manual (PDF)

Obtaining a digital copy of the Singer 44S Heavy Duty sewing machine’s user manual is remarkably straightforward. Singer provides a free PDF version directly on their official website, ensuring you have immediate access to detailed instructions and diagrams. Simply navigate to the Singer support section and search for the 44S model.

Alternatively, several reputable online resources host the manual for convenient download. ManualsDir is a commonly cited source, offering the 65-page document in a readily accessible format (approximately 0.84 MB in size). Continental Sewing Center also provides an instant PDF download option.

Before downloading, verify the source’s legitimacy to ensure you receive a safe and accurate file. The PDF manual covers everything from initial setup and threading to advanced techniques and troubleshooting, making it an invaluable resource for all Singer 44S owners. Having a digital copy allows for easy searching and printing of specific sections as needed.

Where to Find Additional Help & Support

Beyond the comprehensive user manual, Singer offers a robust network of support resources for 44S Heavy Duty owners. The Singer official website is the primary hub, featuring FAQs, troubleshooting guides, and a dedicated support section where you can submit inquiries directly to their customer service team.

For community-based assistance, numerous online sewing forums and groups are populated with experienced Singer 44S users eager to share tips, tricks, and solutions to common problems. These platforms provide a valuable space to ask questions and learn from others’ experiences.

Local sewing machine repair shops can also offer expert assistance, particularly for more complex issues requiring hands-on diagnosis and repair. Remember that Singer has a long-standing reputation for quality, and they are committed to ensuring customer satisfaction with their products. Don’t hesitate to leverage these available resources!

Singer Official Website & Contact Information

The official Singer website (www.singer.com) serves as the central resource for all things Singer, including the 44S Heavy Duty sewing machine. Here, you can download the latest user manuals in PDF format, access a wealth of helpful articles, and explore a comprehensive FAQ section addressing common questions and concerns.

For direct assistance, Singer provides multiple contact options. Their customer service team can be reached via phone, typically during standard business hours. An online contact form is also available, allowing you to submit detailed inquiries and receive a prompt response via email.

Singer actively maintains a presence on social media platforms, offering another avenue for support and engagement. You can find them on Facebook, Instagram, and YouTube, where they share tutorials, tips, and product updates. The SINGER brand has stood for quality in sewing for over 160 years, and they are dedicated to supporting their customers.

Byalessandro

suzuki book 3 violin pdf

Suzuki Violin School‚ Book 3 PDF: A Comprehensive Guide

This guide explores the Suzuki Violin School‚ Book 3 in PDF format‚ detailing its content‚ access options‚ and effective utilization for violin students.

What is the Suzuki Violin School?

The Suzuki Violin School‚ conceived by Shinichi Suzuki‚ represents a revolutionary approach to music education‚ emphasizing learning through imitation and a nurturing environment. Unlike traditional methods focusing on sheet music reading initially‚ the Suzuki method prioritizes developing musicality by ear – mirroring how children learn their native language.

This philosophy extends across multiple volumes‚ each building upon the previous one. The school’s core belief is that any child‚ with proper guidance and a supportive atmosphere‚ can achieve musical proficiency. It’s a holistic system incorporating not just violin instruction‚ but also parental involvement‚ group classes‚ and regular performances.

The method utilizes carefully sequenced pieces‚ starting with simple tunes and gradually increasing in complexity. The “Suzuki name‚ logo and wheel device are trademarks of Dr. Shinichi Suzuki” highlighting the brand’s dedication to his original vision. This approach fosters a love for music and builds a strong foundation in technique.

The Significance of Book 3 in the Suzuki Method

Book 3 marks a pivotal stage in the Suzuki Violin School curriculum‚ representing a significant leap in technical and musical demands. Students transitioning to this volume are expected to have a solid foundation in basic technique and aural skills established in Books 1 and 2. It introduces more complex rhythms‚ higher positions‚ and refined bowing techniques.

The pieces within Book 3 are carefully selected to challenge students while remaining accessible‚ fostering continued growth and confidence. “Revised editing of pieces‚ including bowings and fingerings” demonstrates the ongoing refinement of the material. This volume often includes pieces requiring greater expressive interpretation and musical maturity.

Successfully navigating Book 3 demonstrates a student’s commitment to the Suzuki method and prepares them for the more advanced repertoire found in subsequent volumes. It’s a crucial step towards independent musicality and a deeper understanding of violin playing. The 28 pages of content build upon prior learning.

Understanding the Content of Suzuki Violin School‚ Book 3

Book 3’s content features engravings in a 9×12 format‚ revised pieces with bowings‚ fingerings‚ exercises‚ and a glossary for enhanced learning.

Pieces Included in Book 3

Suzuki Violin School‚ Book 3 presents a carefully selected repertoire designed to build upon the skills established in previous volumes. Students will encounter pieces that progressively increase in technical and musical complexity‚ fostering both proficiency and artistry. The collection includes works by composers such as Seitz‚ Wohlfahrt‚ and others‚ chosen for their pedagogical value and inherent beauty.

These pieces aren’t simply presented as isolated musical items; they are integral to the Suzuki method’s emphasis on learning by ear and developing a refined musical sensibility. The revised edition ensures clarity in both notation and suggested interpretations. Expect to find variations and studies alongside more substantial compositions‚ all contributing to a well-rounded musical education. The pieces are designed to challenge students while remaining accessible with dedicated practice and guidance from a qualified teacher.

The selection aims to broaden the student’s stylistic range and introduce them to different musical periods and forms‚ preparing them for more advanced repertoire in the future.

Technical Exercises and Scales

Suzuki Violin School‚ Book 3 doesn’t solely focus on complete pieces; it incorporates crucial technical exercises and scales to solidify fundamental skills. These exercises are meticulously crafted to address specific challenges in bowing‚ fingering‚ and intonation‚ building a strong technical foundation for students. Scales are presented in a progressive manner‚ expanding the student’s range and familiarity with different key signatures.

The revised edition of the book often includes additional exercises‚ supplementing Dr. Suzuki’s original material‚ offering teachers greater flexibility in tailoring lessons to individual student needs. These exercises aren’t viewed as isolated drills‚ but rather as integral components of musical development‚ directly applicable to the pieces being studied.

Consistent practice of these technical elements is vital for achieving fluency and control on the violin‚ enabling students to express themselves musically with greater confidence and precision.

Focus on Bowing Techniques

Suzuki Violin School‚ Book 3 places significant emphasis on refining bowing techniques‚ moving beyond basic strokes to introduce more nuanced control and expression. The revised edition specifically highlights bowings and fingerings within the pieces‚ offering clear guidance for students and teachers alike. This includes attention to dynamics‚ articulation‚ and phrasing‚ all communicated through precise bowing indications.

Students will encounter opportunities to practice various bowing styles‚ such as legato‚ staccato‚ and spiccato‚ developing versatility and a richer tonal palette. The book encourages a relaxed and efficient bow hold‚ promoting fluidity and preventing tension.

Mastering these bowing techniques is crucial for bringing the music to life‚ allowing students to shape phrases and convey emotion effectively. Consistent attention to bowing‚ guided by the PDF’s notations‚ is key to musicality.

Accessing the Suzuki Violin School‚ Book 3 PDF

Finding the Suzuki Violin School‚ Book 3 PDF involves exploring official sources‚ legitimate online resources‚ and understanding potential risks associated with unofficial downloads.

Official Sources for PDF Download

Securing your Suzuki Violin School‚ Book 3 PDF from official sources guarantees authenticity and supports copyright regulations; Summy-Birchard‚ Inc.‚ holding exclusive license from Shinichi Suzuki‚ is the primary distributor. While a direct PDF download isn’t always prominently featured on their website‚ exploring their catalog and contacting them directly is advisable.

J.W. Pepper‚ a well-known sheet music retailer‚ frequently offers the Suzuki Violin School‚ Book 3‚ including the piano accompaniment‚ in PDF format. Their online platform provides a secure purchasing option and ensures a legitimate copy. Additionally‚ authorized Suzuki method dealers often sell digital versions of the book.

Always verify the seller’s credentials before purchasing. Look for authorized dealer logos or confirmations. Purchasing from official channels protects you from potentially corrupted files or copyright infringements‚ ensuring a high-quality learning experience with the correct engravings and revised editing.

Free Online Resources and Legality

The internet offers numerous websites claiming to provide free Suzuki Violin School‚ Book 3 PDFs. However‚ downloading from these sources often presents legal and ethical concerns. Copyright laws protect the intellectual property of Summy-Birchard‚ Inc.‚ and unauthorized distribution constitutes infringement.

While finding a free copy might seem tempting‚ it risks supporting illegal activities and potentially exposing your device to malware or viruses. Furthermore‚ these unofficial PDFs may contain errors‚ incomplete content‚ or inaccurate fingerings and bowings‚ hindering your learning progress.

Legally accessing the material‚ even if it requires a purchase‚ ensures you receive a complete‚ accurate‚ and ethically sourced resource. Consider exploring library resources or seeking affordable digital options through authorized retailers. Respecting copyright fosters a sustainable environment for musical education and supports the creators of this valuable method.

Potential Issues with Unofficial PDFs

Downloading Suzuki Violin School‚ Book 3 PDFs from unverified sources carries significant risks. These unofficial copies frequently suffer from compromised quality‚ including blurry engravings and inconsistent formatting‚ hindering readability and accurate interpretation of musical notation.

More critically‚ unauthorized PDFs may contain errors in fingerings‚ bowings‚ and even the musical score itself. Relying on inaccurate information can lead to the development of incorrect technique and impede progress. Furthermore‚ these files often lack the crucial piano accompaniment parts essential for effective practice.

Security is another major concern. Unofficial downloads can harbor viruses‚ malware‚ or other harmful software‚ potentially damaging your device and compromising your personal data. Prioritize legitimate sources to safeguard your digital wellbeing and ensure a reliable‚ high-quality learning experience.

Using the PDF Effectively

Maximize your learning with the Suzuki Book 3 PDF by utilizing digital navigation‚ the included piano accompaniment‚ and carefully studying fingerings and bowings.

Navigating the Digital Format

The Suzuki Violin School‚ Book 3 PDF offers several advantages for modern learners. Utilizing features like search functionality allows quick location of specific pieces‚ exercises‚ or musical terms. Zooming capabilities are essential for comfortable viewing on various devices‚ from tablets to laptops.

Hyperlinks‚ if present in the PDF‚ can streamline access to supplementary materials or recordings. Many PDFs also support annotation tools‚ enabling students to mark fingerings‚ bowings‚ or practice notes directly onto the score.

Consider using a PDF reader with bookmarking features to easily return to frequently practiced sections. Regularly saving your annotations ensures your work isn’t lost. Familiarize yourself with the PDF’s navigation pane for efficient page turning and overall organization. A well-organized digital copy enhances the learning experience significantly.

Utilizing the Piano Accompaniment

The Suzuki Violin School‚ Book 3 PDF includes a separate piano accompaniment book‚ crucial for practice and performance. This accompaniment provides the correct tempo‚ phrasing‚ and harmonic support‚ fostering a strong musical foundation. Students should ideally practice with a live pianist‚ but the PDF accompaniment offers a valuable alternative when a pianist isn’t available.

Ensure the piano accompaniment PDF is synchronized with your violin score. Pay close attention to cues and markings indicating entrances and changes.

Utilize the accompaniment for aural training‚ listening carefully to the harmonic context and intonation. Recording yourself playing with the accompaniment allows for self-assessment and identification of areas for improvement. Consistent practice with the piano part builds ensemble skills and musicality‚ vital for Suzuki method success.

Understanding Fingerings and Bowings

The Suzuki Violin School‚ Book 3 PDF features revised editing of pieces‚ specifically regarding fingerings and bowings. These markings aren’t arbitrary; they represent carefully considered pedagogical choices designed to facilitate technical development and musical expression. Students should adhere to these suggestions initially‚ understanding the rationale behind them.

Pay close attention to the bowing indications – legato‚ staccato‚ spiccato – and practice executing them cleanly and consistently. Fingerings guide efficient hand positioning and smooth transitions between notes.

As students progress‚ teachers may introduce alternative fingerings or bowings to encourage exploration and individual interpretation. However‚ a solid understanding of the provided markings is fundamental. Careful observation and consistent practice will unlock the musical potential within each piece.

Supplementary Materials for Book 3

Enhance learning with CD recordings for aural skills‚ teacher resources offering guidance‚ and a glossary defining musical terms found within the Suzuki Book 3 PDF.

CD Recordings for Aural Training

The accompanying CD recordings are an indispensable component of the Suzuki Violin School‚ Book 3‚ designed to cultivate a student’s ear and musicality. These recordings aren’t merely for playing along with; they are foundational for the Suzuki method’s emphasis on learning by ear. Students should listen repeatedly to each piece before attempting to play it‚ internalizing the melody‚ phrasing‚ and overall musical character.

Consistent aural training builds a strong musical foundation‚ improving intonation‚ rhythm‚ and expressive playing. The recordings feature professional performances‚ providing a model for students to emulate. Furthermore‚ listening helps students anticipate musical passages and develop a deeper understanding of the pieces.

Utilizing the CD effectively involves active listening – not just passive hearing. Students can try to sing or hum the melodies‚ identify different instruments‚ and analyze the musical form. This active engagement significantly enhances the learning process and complements the technical exercises within the Book 3 PDF.

Teacher Resources and Guidance

Effective implementation of the Suzuki Violin School‚ Book 3 relies heavily on qualified teacher guidance. The PDF itself‚ while comprehensive‚ benefits immensely from expert interpretation and personalized instruction. Teachers possess the nuanced understanding to address individual student needs‚ offering tailored exercises and modifications to the presented material.

Supplementary teacher resources often include detailed lesson plans‚ pedagogical suggestions‚ and insights into Dr. Suzuki’s philosophy. These resources help educators navigate the challenges of teaching specific pieces and technical exercises.

Teachers also provide crucial feedback on posture‚ bow hold‚ and intonation‚ elements difficult to self-assess using only the PDF. They can also offer alternative fingerings or bowings to suit a student’s hand size or technical level. A skilled teacher transforms the Book 3 PDF from a collection of notes into a vibrant and engaging learning experience.

Glossary of Terms

The Suzuki Violin School‚ Book 3 PDF often incorporates musical terminology that may be unfamiliar to beginner or intermediate students. A dedicated glossary is an invaluable tool for comprehension and accurate interpretation of the presented material. This section clarifies specialized terms related to bowing techniques‚ fingerings‚ dynamics‚ and musical form.

Common terms defined include staccato‚ legato‚ pizzicato‚ and various dynamic markings (piano‚ forte‚ etc.). Understanding these terms is crucial for executing the pieces with the intended expression and nuance.

The glossary also explains specific instructions regarding shifts‚ vibrato‚ and other advanced techniques introduced in Book 3. Furthermore‚ it clarifies any unique symbols or abbreviations used within the score‚ ensuring students can confidently decode and practice the music. A well-defined glossary empowers students to become independent learners.

Byalessandro

dometic fridge error codes pdf

Dometic Fridge Error Codes: A Comprehensive Guide

Navigating Dometic fridge issues? This guide decodes error signals, offering insights from manuals and forums.
Accessing Dometic fridge error codes PDF resources is crucial for effective troubleshooting and repair, ensuring optimal performance.

Understanding Dometic Fridge Error Codes

Dometic fridge error codes are the system’s way of communicating internal problems, vital for diagnosis. These codes, often displayed as flashing patterns or specific alphanumeric designations (like E0, W01, or 33), pinpoint the source of the malfunction. Dometic fridge error codes PDF manuals are essential resources, detailing each code’s meaning and potential solutions.

Understanding these codes moves beyond simple troubleshooting; it empowers owners to address issues proactively. The codes indicate problems ranging from sensor failures (like a defective NTC sensor in the fridge compartment – W01) to compressor cycling issues (Error 33). Accessing the correct Dometic fridge error codes PDF for your specific model (RMD10T, RMS10.5XS, RM3762) is paramount. These manuals often include diagrams and step-by-step instructions, guiding users through the repair process. Ignoring these signals can lead to more significant, costly damage, so prompt interpretation is key.

Importance of Error Code Identification

Accurate identification of Dometic fridge error codes is paramount for efficient repair and preventing further damage. Ignoring these signals can escalate minor issues into major, expensive problems. Utilizing Dometic fridge error codes PDF documentation allows for precise diagnosis, avoiding unnecessary component replacements.

Early identification, guided by the Dometic fridge error codes PDF, can often be resolved with simple fixes like reseating electrical connections – both lower and internal boards. Knowing the code directs troubleshooting efforts, saving time and resources. For example, an E0 error might indicate a minor power fluctuation, while a W01 suggests a faulty NTC sensor. Without the code, diagnosis becomes guesswork. Furthermore, understanding the code helps determine if the repair is within your skillset or requires a qualified Dometic dealer or service center, ensuring safety and proper functionality.

Accessing Dometic Fridge Manuals & PDFs

Locating Dometic fridge manuals and PDFs is essential for decoding error codes and performing effective troubleshooting. Dometic’s official website is a primary resource, offering a comprehensive library of documentation for various models, including specific Dometic fridge error codes PDF guides. Online forums dedicated to RV and appliance repair frequently host user-shared manuals and troubleshooting tips.

Searching directly for your model number (e.g., RMD10T, RMS10.5XS, RM3762) alongside “manual” or “Dometic fridge error codes PDF” yields targeted results. Many RV dealerships also provide access to these resources. These PDFs detail error code explanations, troubleshooting steps, and even wiring diagrams. Remember to download and save the relevant Dometic fridge error codes PDF for offline access, particularly when working remotely. Having the correct manual empowers you to understand and address fridge issues confidently.

Common Dometic Fridge Error Codes

Decoding Dometic fridge issues requires understanding common error signals. Referencing a Dometic fridge error codes PDF is vital for identifying problems and initiating repairs.

Error Code E0: General Overview & Potential Causes

Error code E0 on a Dometic fridge signals a general issue, often related to the control board or power supply. As detailed in service manuals and online forums, the fridge may still function somewhat with this error, but it indicates an underlying problem needing attention. A primary troubleshooting step, frequently suggested, involves reseating electrical connections.

Begin by disconnecting power and carefully reseating the connections on the lower board, located externally. If the issue persists, access the internal connections (often behind an “eyebrow” panel) and reseat those as well. The Dometic fridge error codes PDF documents highlight this as a common fix. The error can also stem from intermittent power supply issues, so verifying a stable power source is crucial.

Consulting the specific model’s Dometic fridge error codes PDF will provide more tailored guidance, as the root cause can vary. While E0 isn’t always catastrophic, ignoring it can lead to more significant failures. Remember to always prioritize safety when working with electrical appliances.

Error Code W01: NTC Fridge Compartment Defective

Error code W01 on a Dometic refrigerator specifically indicates a defective NTC (Negative Temperature Coefficient) sensor within the fridge compartment. According to Dometic fridge error codes PDF documentation, this sensor is crucial for accurate temperature readings. When it malfunctions, the fridge’s control system receives incorrect data, triggering the error. The display will typically show a warning symbol with all temperature LEDs flashing.

Troubleshooting involves first checking the connection of the NTC sensor itself. Ensure it’s securely plugged in and that the wiring isn’t damaged. If the connection appears sound, the sensor likely needs replacement. The Dometic fridge error codes PDF provides diagrams to locate the sensor within your specific model.

This error applies to both 110AC and 2-way (gas/electric) refrigerators. Replacing the NTC sensor is generally a straightforward repair, but consulting the Dometic fridge error codes PDF for your model is vital to ensure you use the correct replacement part and follow proper installation procedures.

Error Code 33: Compressor Cycling Issues

Error Code 33 on Dometic refrigerators, particularly models like the CFF35, signals issues with the compressor’s cycling behavior. Online forums suggest this often manifests as the compressor repeatedly turning on and off in short intervals. While the fridge may still cool somewhat, this erratic operation indicates a problem requiring attention. Referencing a Dometic fridge error codes PDF is essential for model-specific details.

A temporary workaround mentioned by users involves simply turning the fridge off, but this isn’t a solution. The root cause could range from a faulty compressor to problems with the control board or refrigerant levels. The Dometic fridge error codes PDF will detail diagnostic steps, but often, professional assistance is needed.

Due to the complexity of compressor systems, attempting repairs without proper training is discouraged. Contacting a Dometic dealer or qualified service technician, as outlined in the Dometic fridge error codes PDF, is the recommended course of action for resolving Error 33.

Troubleshooting Steps for Dometic Fridge Errors

Initial steps involve reseating electrical connections – both lower and internal boards. Consult a Dometic fridge error codes PDF for diagrams and specific sensor checks to resolve issues.

Reseating Electrical Connections (Lower & Internal Boards)

A common first step in addressing Dometic fridge error codes, particularly the E0 error, involves carefully reseating electrical connections. Begin by disconnecting the power source – both AC and DC, and gas if applicable – to ensure safety. Locate the lower control board, typically found on the exterior of the refrigerator. Gently disconnect and reconnect all wiring harnesses, ensuring a firm and secure fit.

Next, access the internal control board, often behind an “eyebrow” panel inside the fridge. Again, disconnect and reconnect all connections. Referencing a Dometic fridge error codes PDF can be invaluable here, providing visual aids to identify the correct connectors. This process helps eliminate potential issues caused by loose or corroded connections. A secure connection is vital for proper operation. If the error persists after reseating, further investigation, guided by the Dometic fridge error codes PDF, will be necessary.

Checking NTC Sensor Connections

Error code W01 specifically indicates a defective NTC (Negative Temperature Coefficient) sensor within the fridge compartment. Before replacing the sensor, meticulously check its connections. Disconnect power to the refrigerator. Locate the NTC sensor – a Dometic fridge error codes PDF will illustrate its position. Carefully disconnect the wiring harness from the sensor.

Inspect the connector for corrosion or damage. Clean the contacts with electrical contact cleaner if necessary. Reconnect the harness, ensuring a secure fit. If the error persists, use a multimeter to test the sensor’s resistance, comparing the reading to the specifications outlined in the Dometic fridge error codes PDF. A faulty sensor will require replacement. Proper NTC sensor function is critical for accurate temperature regulation and preventing further issues. Always consult the manual for specific testing procedures.

Power Source Considerations & Testing

Dometic refrigerators operate on multiple power sources – AC, DC, and sometimes gas. Error codes can stem from insufficient or unstable power. Begin by verifying the power source itself. For AC, check the voltage at the outlet using a multimeter; ensure it matches the fridge’s requirements. When using DC (e.g., from a vehicle’s battery), confirm the battery is fully charged and the wiring is secure.

A Dometic fridge error codes PDF may detail specific voltage ranges for different models. Test the fridge on each power source to isolate the problem. Low voltage can trigger false error codes. Inspect the fridge’s internal fuse and circuit breaker. A blown fuse or tripped breaker indicates a power surge or short circuit. Consult the manual for fuse replacement procedures. Proper power supply is fundamental for reliable operation;

Specific Dometic Fridge Models & Error Codes

Model-specific troubleshooting is key! Accessing a Dometic fridge error codes PDF for your unit (RMD10T, RMS10.5XS, RM3762) unlocks targeted diagnostic information and repair guidance.

RMD10T & RMD10X Series Error Codes

Understanding errors in the RMD10T and RMD10X series requires referencing the official Dometic fridge error codes PDF manual. These absorption refrigerators, detailed in operating manuals available online, utilize a system of flashing error codes to indicate issues. The manual emphasizes careful reading before initial use and safe storage for future reference.

Common problems often relate to the NTC sensor, as indicated by error code W01, requiring connection checks or sensor replacement. General errors, like E0, suggest reseating electrical connections on both the lower and internal boards – a frequently recommended first step based on user reports. The PDF provides a description of symbols used in the display, aiding in accurate interpretation.

Remember, the manual stresses the importance of contacting a Dometic dealer or service center for complex issues or when error codes persist despite troubleshooting. Utilizing the Dometic fridge error codes PDF is the first step towards self-diagnosis, but professional assistance is sometimes necessary for safe and effective repair.

RMS10.5XS Error Codes & Troubleshooting

The Dometic RMS10.5XS fridge presents unique challenges, and accessing the specific Dometic fridge error codes PDF for this model is paramount. User reports frequently detail a scenario where the fridge simply reverts to an error triangle and emits a beeping sound on all power sources, demanding immediate attention. Initial troubleshooting steps involve carefully examining the fault code displayed, as outlined in the manual.

The PDF documentation will detail specific error codes and their corresponding solutions. While general advice like reseating electrical connections applies, the RMS10.5XS may have unique issues. It’s crucial to consult the manual’s troubleshooting section before attempting repairs. Remember to check the connection of the NTC sensor, a common point of failure.

If the error persists, the Dometic fridge error codes PDF will guide you towards contacting a Dometic dealer or authorized service center. Attempting complex repairs without proper knowledge can void warranties and potentially damage the unit further. Prioritize safety and professional assistance when needed.

RM3762 Error Codes & Dealer Contact

The Dometic RM3762 refrigerator utilizes a flashing error code system to indicate malfunctions. Accessing the official Dometic fridge error codes PDF manual is essential for accurate diagnosis. These codes are displayed by alternating between temperature and a specific message, requiring careful observation to decipher. The manual provides a comprehensive table detailing each code and its potential causes.

Common issues, as detailed in the PDF, may relate to sensor failures or internal component problems. However, the manual explicitly states that if an error code appears, contacting a Dometic dealer or authorized service center is the recommended course of action. Self-repair attempts can be risky and may invalidate the warranty.

Locating a Dometic dealer is simplified through their website, offering a network of qualified technicians. The PDF manual emphasizes that professional intervention is crucial for complex repairs, ensuring the longevity and safe operation of your RM3762 refrigerator.

Advanced Troubleshooting & Repair

Decoding complex issues? Consult the Dometic fridge error codes PDF for flashing patterns. When self-repair fails, contact a Dometic dealer for expert assistance.

Identifying Flashing Error Code Patterns

Decoding the blink is key! Dometic fridges often communicate issues through specific flashing sequences, beyond a simple static error code. The Dometic fridge error codes PDF manuals are invaluable here, detailing these patterns. These codes display by alternating between temperature and the error message itself.

For example, a rapidly flashing code might indicate a sensor malfunction, while a slower, repeating pattern could point to a compressor issue. Understanding the rhythm and combination of flashes is crucial for pinpointing the root cause. Online forums also provide user-shared experiences and interpretations of these patterns, supplementing the official documentation.

Carefully observe the display, noting the number of flashes, their duration, and any pauses between them. Cross-reference this information with the Dometic fridge error codes PDF to accurately identify the problem. Remember, accurate identification is the first step towards a successful repair!

When to Contact a Dometic Dealer or Service Center

Don’t risk further damage! While many Dometic fridge issues can be addressed with basic troubleshooting – guided by a Dometic fridge error codes PDF – certain situations demand professional intervention. If you’ve exhausted the troubleshooting steps in the manual and the error persists, it’s time to call in the experts.

Specifically, issues involving the cooling unit, gas lines (if applicable), or complex electrical components should be handled by qualified technicians. Attempting repairs beyond your skill level could void your warranty or create safety hazards. The Dometic fridge error codes PDF often explicitly states when dealer contact is necessary for specific codes.

Furthermore, if you suspect a refrigerant leak or experience unusual noises, immediately contact a Dometic dealer or authorized service center. They possess the specialized tools, knowledge, and certifications to diagnose and repair these complex systems safely and effectively.

Resources for Dometic Fridge Repair (PDF Manuals)

Empower yourself with knowledge! Accessing Dometic fridge error codes PDF manuals is paramount for successful DIY repairs. Dometic’s official website provides a comprehensive archive of manuals for various models, including the RMD10T, RMD10X, and RMS10.5XS series. These manuals detail error code explanations, troubleshooting guides, and parts diagrams.

Beyond the official site, numerous online forums and RV-specific websites host user-shared Dometic fridge error codes PDF documents and repair tips. These community resources can offer valuable insights from experienced owners facing similar issues. Remember to verify the manual’s applicability to your specific model number;

Additionally, service manuals (like the one for the 1350 model referenced online) often contain more detailed diagnostic information and wiring schematics. Utilizing these resources, alongside a systematic approach, significantly increases your chances of resolving Dometic fridge errors independently.

Byalessandro

bryant 90 plus furnace manual

Bryant 90 Plus Furnace Manual: A Comprehensive Guide

This manual offers detailed troubleshooting, safety guidelines, and operational insights for Bryant 90 Plus furnaces, addressing issues like ignition, air pressure, and control boards.

Understanding the Bryant 90 Plus Furnace

The Bryant 90 Plus furnace, often identified as an M-Series model, represents a high-efficiency heating system designed for residential use. These furnaces were frequently marketed as drop-in replacements for older units, utilizing existing 4-wire thermostat interfaces. However, their design has been linked to potential long-term reliability concerns, notably secondary heat exchanger plugging.

Understanding its operation is crucial for effective troubleshooting. Common issues include pilot light failures, repeated ignition lockouts (indicated by a solid red light), and problems with the air pressure switch, sometimes due to water accumulation. Recognizing these patterns, alongside knowledge of communication wiring and control board functionality, is key to maintaining optimal performance.

Key Features and Specifications

Bryant 90 Plus furnaces boast high Annual Fuel Utilization Efficiency (AFUE) ratings, maximizing heating output while minimizing energy consumption. These models feature a two-stage operation for enhanced comfort and efficiency. Key components include a sealed combustion system, a variable-speed blower motor, and a robust heat exchanger – though the latter has been subject to scrutiny.

Specifications vary across M-Series models, but generally include input ratings between 80,000 and 120,000 BTU/h. Compatibility with various thermostat types, including those requiring 4-wire connections, is a defining feature. Understanding these specifications is vital for proper installation, maintenance, and troubleshooting.

Furnace Model Series (M-Series Identification)

The Bryant 90 Plus furnace line primarily falls under the M-Series designation, crucial for identifying specific models and accessing relevant documentation. Recognizing the M-Series is vital due to shared components and potential issues, notably concerning the secondary heat exchanger. These furnaces were also sold under the Carrier brand, leading to a class action lawsuit related to premature heat exchanger failure.

Identifying the exact M-Series model number, typically found on the unit’s data plate, unlocks access to specific parts lists, wiring diagrams, and troubleshooting guides. This identification is paramount when seeking support or replacement parts.

Safety Precautions

Working with furnaces involves inherent risks; prioritizing safety is paramount. Always disconnect power to the furnace at the breaker before performing any maintenance or troubleshooting. Be acutely aware of potential carbon monoxide (CO) hazards – ensure CO detectors are installed and functioning correctly. Never attempt repairs if you are uncomfortable or lack the necessary expertise; contact a qualified HVAC technician.

Pilot light issues require extreme caution. Follow relighting instructions meticulously, and if the pilot repeatedly fails to stay lit, seek professional assistance. Improper handling can lead to gas leaks or explosions.

General Safety Guidelines

Before any inspection or service, completely shut off the gas supply to the Bryant 90 Plus furnace. Verify power is disconnected at the breaker panel. Never bypass safety controls or tamper with the furnace’s internal components. Wear appropriate personal protective equipment, including safety glasses and gloves, during any maintenance tasks.

Regularly inspect the furnace area for obstructions and flammable materials. Ensure adequate ventilation. If you detect a gas odor, immediately evacuate the premises and contact the gas company. Do not operate the furnace if water is present in the air pressure switch or tubing.

Carbon Monoxide Awareness

Carbon monoxide (CO) is a colorless, odorless, and deadly gas. A malfunctioning Bryant 90 Plus furnace can potentially produce CO. Install and maintain CO detectors on every level of your home, especially near sleeping areas. Familiarize yourself with the symptoms of CO poisoning: headache, dizziness, nausea, and confusion.

If a CO detector alarms, immediately evacuate everyone from the home and call 911. Never ignore a CO alarm! Regular professional furnace inspections are crucial to identify and address potential CO hazards. A plugged secondary heat exchanger, common in M-Series furnaces, can increase CO risk.

Thermostat Compatibility and Settings

Ensuring proper thermostat function is vital for your Bryant 90 Plus furnace. Verify your thermostat is set to “heat” mode and the desired temperature exceeds the current room temperature to initiate heating. Many modern thermostats require battery replacements; low batteries can cause erratic behavior.

Older homes often utilized a 4-wire thermostat interface. The Plus 90 was designed to accommodate this, but compatibility issues can arise. Confirm the thermostat is compatible or consider upgrading to a modern, compatible model. Incorrect settings or a malfunctioning thermostat can prevent the furnace from operating correctly;

Thermostat Mode Verification (Heat vs. Cool)

A frequent oversight is an incorrectly set thermostat mode. Before initiating troubleshooting, meticulously verify the thermostat is switched to “heat” mode, not “cool” or “auto.” The furnace will not activate if set to cool during winter months. Double-check this setting, even if it appears correct initially.

Confirm the desired temperature setting is higher than the current room temperature. If the thermostat displays a lower temperature, the furnace won’t engage. Simple verification of these two settings can resolve many no-heat situations, saving time and potential service calls.

Battery Replacement

Low thermostat batteries are a surprisingly common cause of furnace issues. A weakened battery can lead to inaccurate temperature readings or complete thermostat failure, preventing the furnace from receiving the signal to operate. Regularly check and replace the batteries, typically twice a year – at the beginning and end of the heating season.

Even if the thermostat display appears functional, low batteries can cause intermittent problems. Replacing them proactively can prevent unexpected heating disruptions. Use the correct battery type as specified in your thermostat’s manual for optimal performance.

4-Wire Thermostat Interface Considerations

The Bryant 90 Plus furnace was often designed as a drop-in replacement for older systems utilizing a traditional 4-wire thermostat interface. This older system relied on simple mercury tube and bimetal strip technology. However, compatibility issues can arise when modern, more complex thermostats are used with this older wiring configuration.

Ensure your thermostat is fully compatible with the furnace’s control board. Incorrect wiring or an incompatible thermostat can lead to operational problems, including ignition failures or inconsistent heating. Careful verification and potentially reprogramming may be necessary.

Ignition System Troubleshooting

A common issue with the Bryant 90 Plus furnace is a failing or intermittent ignition system, often manifesting as a pilot light that won’t stay lit. This results in heat loss and service interruptions. Begin by carefully following the step-by-step relighting instructions detailed in the full manual.

Repeated ignition failures can trigger a lockout state, indicated by a solid red light on the control board. Thoroughly check all communication wiring for secure connections and continuity. If problems persist, consult the Bryant technical documentation for specific pinout and protocol information.

Pilot Light Issues: Causes and Relighting Instructions

The Bryant 90 Plus furnace pilot light can unexpectedly extinguish, leading to heating disruptions. Common causes include a faulty thermocouple, a dirty pilot orifice, or insufficient gas supply. Always prioritize safety – ensure the gas valve is in the ‘off’ position before attempting relighting.

Follow the manufacturer’s precise relighting instructions, typically involving turning the gas valve to ‘pilot’, pressing and holding the reset button while igniting the pilot, and then releasing the button. If the pilot won’t stay lit, professional service is recommended.

Repeated Ignition Failures & Lockout States (Solid Red Indicator)

A solid red indicator light on your Bryant 90 Plus furnace signals a lockout state, typically triggered by repeated ignition failures. This safety feature prevents gas buildup during continuous unsuccessful attempts. Before resetting, check all communication wiring for secure connections and continuity.

Ensure thermostat compatibility and proper function. If issues persist, the control board may require reprogramming or replacement. Consult Bryant technical documentation for specific pinouts and protocols. Ignoring this warning and repeatedly attempting resets without addressing the root cause can be dangerous.

Checking Communication Wiring & Continuity

Proper communication between the furnace control board, thermostat, and any zoning modules is crucial for reliable operation. Begin by meticulously inspecting all wiring connections, ensuring they are secure and free from corrosion. Use a multimeter to verify continuity along each wire run, identifying any breaks or shorts.

Pay close attention to the thermostat wiring, especially in older installations. Faulty wiring can mimic other problems, leading to misdiagnosis. Refer to the Bryant technical documentation for correct pinout configurations and wiring diagrams to confirm proper connections.

Air Pressure Switch Problems

The air pressure switch is a vital safety component, preventing operation if adequate airflow isn’t detected. Issues often manifest as a furnace that won’t start or intermittently shuts down. A common culprit is water accumulation within the switch itself or the connecting tubing, particularly during colder weather, leading to blockage and false readings.

Carefully inspect the tubing for kinks or obstructions. Gently blow through the tube to clear any water or debris. If the switch remains faulty, replacement is often necessary. Low air pressure, caused by a clogged filter or blower issues, can also trigger this problem.

Water in Air Pressure Switch & Tubing

Condensation buildup within the air pressure switch and its associated tubing is a frequent issue, especially in colder climates. This moisture can freeze, blocking airflow detection and preventing the furnace from initiating the heating cycle. The problem often appears as intermittent operation or a complete failure to start.

Carefully disconnect the tubing from both the switch and the blower compartment. Gently blow compressed air through the tubing to dislodge any water or ice. Inspect the switch itself for visible moisture and ensure it’s securely mounted. Addressing this issue promptly is crucial for reliable furnace operation.

Low Air Pressure Causes

Insufficient airflow is a common culprit behind furnace malfunctions, triggering the air pressure switch to shut down the system. Several factors can contribute to this, including a clogged air filter – a simple fix often overlooked. Blocked supply or return vents also restrict airflow, as does a disconnected or damaged blower motor.

Furthermore, a significantly long or kinked air pressure tube can impede accurate readings. Inspect ductwork for leaks or collapses. Addressing these issues ensures proper combustion and prevents potential safety hazards related to inadequate ventilation.

Heat Exchanger Issues

The heat exchanger is a critical component, and failures can be dangerous. Cracks or corrosion within the exchanger allow combustion gases to leak into the living space, posing a serious health risk. A plugged secondary heat exchanger, particularly prevalent in M-Series furnaces, restricts airflow and reduces efficiency.

This plugging can lead to overheating and potential component damage. The Carrier class action lawsuit highlights concerns regarding the longevity and potential for heat exchanger failure in these models. Regular professional inspections are crucial for early detection and preventative maintenance.

Secondary Heat Exchanger Plugging (M-Series Furnaces)

M-Series Bryant 90 Plus furnaces are particularly susceptible to secondary heat exchanger plugging. This occurs due to the design and materials used, leading to the buildup of condensation and slag. This restricts airflow, reducing heating efficiency and potentially causing overheating.

The resulting strain can lead to premature component failure. Online discussions frequently mention this issue, linking it to the Carrier class action lawsuit concerning these furnaces. Regular inspection and cleaning are vital, but often a complete replacement is the most effective long-term solution.

Carrier Class Action Lawsuit Relevance

The frequent secondary heat exchanger failures in Bryant 90 Plus (M-Series) furnaces are directly linked to a significant Carrier class action lawsuit. These furnaces were sold under various brand names, including Bryant, and the lawsuit alleges premature failure of the heat exchanger due to design flaws.

The core issue revolves around the use of materials prone to corrosion and cracking; Online forums highlight this connection, advising owners to research the lawsuit. Understanding this history is crucial when assessing repair options, as replacement may be more cost-effective than repeated repairs.

Control Board Reset Procedures

Many Bryant furnaces feature a reset button conveniently located on the furnace’s control board. This button can resolve temporary lockouts triggered by repeated ignition failures, often indicated by a solid red light. Before attempting a reset, ensure the gas supply is shut off and power is disconnected for safety.

Locating the button requires accessing the control panel; consult your specific model’s documentation; If a reset doesn’t resolve the issue, or if incompatible controls are present, reprogramming or replacement may be necessary. Always prioritize safety and consult a qualified technician.

Locating the Reset Button

The reset button on a Bryant 90 Plus furnace is typically found on the integrated control board, but its exact location varies by model. Accessing it usually requires removing the furnace’s access panel, often located on the front or side. Carefully disconnect power before proceeding to ensure safety.

Consult your specific furnace’s wiring diagram or owner’s manual for precise instructions. The button is generally a small, recessed button, often red or black. If you’re uncomfortable accessing the control board, it’s best to contact a qualified HVAC technician for assistance.

Reprogramming Incompatible Controls

If your Bryant 90 Plus furnace experiences communication issues with a replaced or existing control, reprogramming might be necessary. This often arises when transitioning from older, 4-wire thermostat interfaces to modern systems. Carefully review the furnace’s technical documentation for specific reprogramming sequences.

Pinout verification is crucial; ensure correct wiring connections before attempting any reprogramming. Some controls require specialized software or a technician’s expertise. Incorrect reprogramming can lead to further malfunctions, so proceed cautiously or seek professional assistance to avoid damaging the system.

Troubleshooting Communication Protocols

Effective troubleshooting of communication protocols is vital for a functioning Bryant 90 Plus furnace. Begin by meticulously verifying the pinout connections between the control board, thermostat, and any zoning modules. Ensure all wiring is secure and free from corrosion.

Consult Bryant’s technical documentation to understand the specific communication protocol used by your model. Issues can stem from incompatible components or incorrect settings. If problems persist, systematically test each connection and component to isolate the source of the communication failure, potentially requiring a control board reset.

Pinout Verification

Accurate pinout verification is crucial when diagnosing communication issues within the Bryant 90 Plus furnace system. Mismatched or incorrect wiring at the control board, thermostat, or zoning module can disrupt the entire heating process. Refer to the official Bryant technical documentation for the precise pin assignments for your specific furnace model.

Carefully compare the wiring configuration against the documented pinout diagram. Use a multimeter to confirm continuity and identify any shorts or open circuits. Incorrect pin connections can lead to repeated ignition failures or lockout states, necessitating a thorough pinout check.

Compatibility with Zoning Modules

Ensuring compatibility between the Bryant 90 Plus furnace and any installed zoning modules is paramount for efficient and controlled heating. Incorrectly paired systems can lead to uneven temperature distribution, system malfunctions, and reduced energy efficiency. Verify that the zoning module is specifically designed to work with the furnace’s control board and communication protocol.

Consult the zoning module’s documentation to confirm compatibility. Improper integration can cause communication errors, preventing the furnace from responding correctly to thermostat commands or zone calls. A properly configured zoning system optimizes comfort and minimizes energy waste.

Long-Term Reliability Concerns

The Bryant 90 Plus furnace, particularly M-series models, has faced scrutiny regarding long-term reliability. Reports suggest a potential for premature failure, often linked to secondary heat exchanger issues and slag buildup. This can lead to reduced efficiency and, in severe cases, safety hazards. Owners should be aware of the Carrier class action lawsuit related to similar models.

Regular professional inspections are crucial to identify and address potential problems early on. Proactive maintenance, including cleaning and component checks, can help mitigate risks and extend the furnace’s lifespan, despite inherent design concerns.

Potential for Long-Term Issues

Bryant 90 Plus furnaces, especially those within the M-series, exhibit a propensity for secondary heat exchanger plugging. This is often attributed to the furnace’s design and the materials used, leading to slag accumulation. Over time, this can severely restrict airflow and diminish heating efficiency. The resulting strain on components may cause premature failure.

Furthermore, the furnace’s compatibility with older 4-wire thermostat interfaces, while initially convenient, may contribute to long-term control issues. Vigilant monitoring and preventative maintenance are essential to address these potential problems proactively.

Slag Processing Considerations (Ladle/Electric Arc Furnace)

The issues plaguing the Bryant 90 Plus furnace, specifically secondary heat exchanger failures, draw parallels to slag processing in metallurgical applications. Like slag accumulation in ladles and electric arc furnaces, the furnace’s design allows for buildup, hindering optimal function. This necessitates careful consideration of material composition and flow dynamics.

Wasteful joint processing of slags, mirroring the furnace’s internal issues, highlights the importance of preventative measures and efficient material handling. Understanding these parallels can inform strategies for mitigating long-term reliability concerns within the heating system.